Thursday, December 2, 2010

Library Pocket Advent Calendar


As I have mentioned in previous posts, I LOVE Christmas!  As a special way of leading up to Christmas Day, our family has set aside a special activity for each day of Advent.  We have used many formats for our Advent calendars/activities over the years.  This year, I decided to try something new. 

A friend of mine posted this idea on her Facebook wall, and I absolutely loved it.  Thank you Paula!  I had most of the supplies on hand, and headed straight out to get the rest.  Here is a quick tutorial for this fun and cute Library Pocket Advent Calendar.

Supplies
25 Library Pockets (I used Red and Green) - available at teacher supply stores or here.
Scrapbook Paper
Cardstock
1" Book Ring
Ribbon
Number Stamps & Ink Pad
Scissors or Cutting Tools
Hole Punch
Printer
Scrapbook Adhesive, Double Stick Tape or Glue
Hook (I used a Command Hook)


To begin, cut circles out of your scrapbook paper.  


Glue or adhesive the circle to a contrasting print and cut a square that is slightly larger than the circle.


Punch out or cut a smaller circle out of solid paper or cardstock.


Glue or adhesive the smaller circle on top of the larger one.


Glue or adhesive the entire square to the front (pocket side) of the Library Pocket.


Next, prepare your stamp with the # you will be using.  I prefer acrylic stamps to rubber because you can see what you are doing.  Stamp your # in the center of the smaller circle.


Punch a hole in the upper left corner.  You might want to do this step all together so the holes are all lined up.


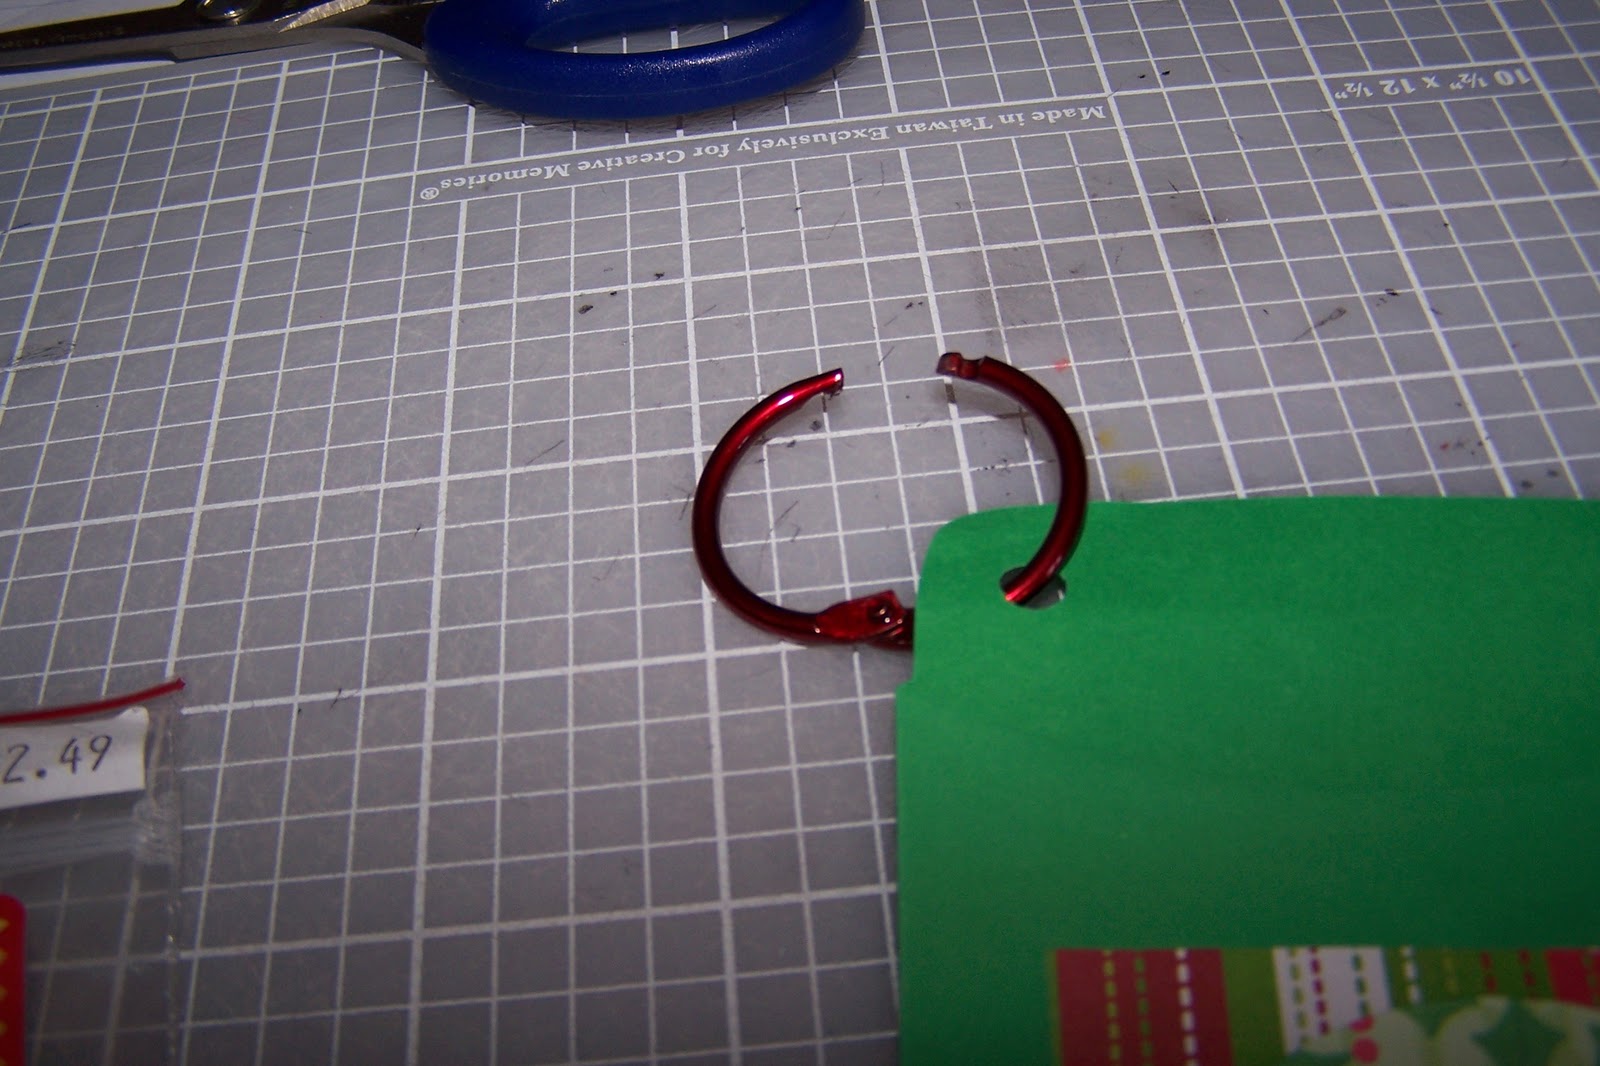
Use a 1" book ring to hold the pockets in place.


Next, print off your activities for each day.  I print mine onto white cardstock and use red and green ink.  The cards should measure approximately 3.25" by 4.25" to fit nicely into the pockets.  Cut them out and place them into the pockets.  You can download and print the activities we use by clicking on the document below:


Finish off with a bow and hang!  I pull off the pocket at the end of each day and move it to the back so that the new one is in front.  


Wednesday, December 1, 2010

Christmas Nails


Several years ago, our family started a tradition of making and giving out Christmas Nails to various people we come into contact with throughout the Advent season.  We make a big batch of them at the start of the season, which is always a fun and special time.  As we are making the ornaments, we are praying for the people who will ultimately receive them

Once they are made, we keep some in a basket by our front door to give to delivery people or visitors, and we always have a few with us in my purse for when we are out.  We give these to waiters, grocery store clerks, postal workers, etc. - really anyone we come into contact with in the weeks leading up to Christmas.  

It is such a joy to see the faces of these people light up when they are given an unexpected gift.  They are always surprised and humble, and I have never had one turned down.

I have gotten several hugs and lots of tears.  Store clerks in particular are very touched, as many of the people they deal with this time of year are less than patient and way over-stressed.  Sadly, these clerks get the brunt of a lot of that frustration taken out on them.  

The ornaments are so easy to make.  All you need are a few basic supplies and a few minutes!  

Supplies
7 3/4" Landscaping Nails (available at your local home improvement store)
Ribbon or Cording
Cardstock, any color
Scissors or a Paper Cutter
Hole Punch
Match, Lighter or Fray Check (optional)


Begin by clicking the printable below to download and print the explanation cards onto your cardstock.  I use white or ivory cardstock and a color printer, but you could easily use red or green cardstock and black ink.


Cut out the individual cards using either scissors or a paper cutter.


Punch a hole in the upper left corner of each card.


Run ribbon through hole and tie onto nail using a square knot.


Tie a second square knot at the top, forming a loop to hang the nail with.  I use a fireplace lighter to defray the two ends of the ribbon.  Just gently hold the flame over the very edge of the ribbon for 1/2 a second.  I do this with all my ribbons and bows!  It is an optional step, but keeps them looking nice for years to come. You can also use a match or Fray Check.


Pray over each ornament and experience the incredible joy of blessing the unexpected recipient with a special gift!


May you feel the love of Christ, as you allow Him to shine on others through you this Christmas season!


Sunday, November 28, 2010

"Crystal" Wreath Tutorial


I came across this wreath awhile back online and thought it would be perfect for Princess to make for her room.   We made it together during Super Tot's nap.  It took about 40 minutes to make and only cost $2 ($1 for the bags and $1 for the ribbon - we had the rest of the supplies on hand).  We love the finished product and it looks just beautiful on her door!

Supply List:

1 metal hanger (white is recommended)
1-2 boxes of fold top sandwich bags (not zipper bags)
Ribbon for a bow
Stuffed animal or other accent item (optional)


I failed to take a photograph of the hanger, but I simply used my hands to bend it into a circle.  It wasn't perfect, but it was easy.  You could use pliers, but we did not find that to be necessary.  You can also use wire cutters to make the wreath smaller, but we liked the size we ended up with (approx. 12" diameter).

Once you have the hanger bent into a circle, lay out your first bag and fold it in half lengthwise.


Next, pinch the bag in the center and tie it around the hanger in a single overhand knot.


GENTLY pull it tight.  Don't pull too hard or you will rip the bag.


As you tie the knots, push/slide the bags to the top of the hanger.  


Princess and I worked together on her wreath.  It was fun to do the project together, and it cut the work in half.  


Princess twisted her bags a little to make it easier for her to tie the knots.  


Once she tied each knot, she would use her hands to fluff any of the ends that were still twisted.  


We used an entire box (120) of bags.  We purchased our box at the Dollar Store and it was the last box they had.  The photo below shows how much of the hanger we still had left after using all 120 bags.  

We didn't have any more bags and really wanted to finish the project during Super Tot's nap, so we spaced the bags out a little thinner and decided it would be fine.  You could use additional bags if you wanted a fuller wreath.  

Once we put on the bow, it made a huge difference and looked great.   I decided to add the little stuffed animal to match the tree in her room.  The wreath is hanging on her door and it is just adorable!!  


Princess has this tree in her room.  It was a gift from one of her grandmothers several years ago.  The wreath is a perfect compliment to the tree!


This was a super fun and easy craft that could be done together, or by a child alone.  I don't think you can beat $2.00 for a sweet Christmas decoration, either!!  Princess has already gotten so many comments on the wreath and people think we purchased it already made!  

Wednesday, November 17, 2010

Thankful Turkeys


Let me start by saying that I LOVE Christmas.  It is my favorite holiday and I love everything about it.  We take December off of school and spend the entire month focused on celebrating Christ and living out His example to love others.  We are intentional about doing that all year, but it is distinctly special as we celebrate Advent.

That being said, I try to be very deliberate about not skipping over Thanksgiving.  Not only do we spend November talking about what we are thankful for and the many incredible blessings the Lord has granted us, but we also do specific Thanksgiving or thankful crafts as a concrete way of remembering those blessings.  Yesterday, we made our Thankful Turkeys.  It was a fun project that both children loved, and I think the finished products are adorable.  Princess named them "Petunia" and "Picasso."  I'll bet you can figure out why!  

Let's start with Super Tot's "Picasso."  I had everything laid out for him and sat with him to complete his craft.  First, I put a dab of glue on each foot and pointed to where he should place them.  I think he did a fantastic job!  Next, he picked out his turkey's eyes from a sheet of adhesive eyes I picked up over the summer.    


Although he put them both on sideways, I was impressed at his placement.   


I put the glue on the beak and waddle for him, and he placed them on his turkey.


Next, we moved on to the feathers.  We were writing one thing on each feather that he was thankful for. I would ask him if he wanted me to write a specific item and he would say yes or no.  He ended up saying yes to:

1 - Mommy
2 - Daddy
3 - Sissy
4 - Zeppy (one of our cats)
5 - Minky (our other cat)
6 - Trains

I wrote one on each feather and gave him markers and stickers to decorate them.  He loves to use both of these, so he was thrilled.

Once he was done decorating each feather, I put some glue on a small piece of poster board and let him place the feathers on.

After each feather was in place, I pointed to the "middle" and asked him to glue the turkey's body there.  He did a pretty good job!

It's a little cubist in style, but I love it!


Princess was also excited to do her Thankful Turkey.  I had her supplies ready in one of her snack workboxes.

She put red glitter glue "toenail polish" on her turkey's feet.


Then she made a red bow for her head.


She even used a little gold to make a ring for her turkey.  

This was a very simple, yet super fun craft for both Princess and Super Tot.  Here are the finished products!


For more fun fall craft ideas, click here.  
For more Tot School ideas, click here.