Wednesday, July 18, 2012

Traceable Alphabet Book


ABC & 123
Tracing Book
I have wanted to make an alphabet tracing book for Super Tot for a while now and finally got around to doing it.  I am thrilled with how it turned out, too! 

I started with a 4x6 plastic photo album from Dollar Tree.  It had room for 36 photos, which was perfect for including the entire alphabet plus the numerals 1-10.

Next, I went to this website and created my tracing cards.  I used the Print Style Worksheets Sentence Worksheet Maker.  I did one letter at a time so that I could enlarge them to my desired size.  For the “sentence,” I put a space before the letter and then typed the Uppercase & Lowercase letter.  I clicked on Portrait-Style and ¾ Inch Size.  You can even change the color of the lines, as well as the text color.  Then, I hit print and zoomed it to 250%.  This printed only a portion of the page, but I only needed one set of letters.  I tried numerous other sizes and variations, but this was the only one that worked for what I wanted.  

I redid this for each letter and numeral.  Then, I got to cutting!  Using a paper cutter, I cut each letter and numeral out and attached them to cardstock using scrapbook adhesive. 
I then placed them in the album and searched for clipart I liked for the cover (I don’t own the clipart, so I can’t share it). 

Using a dry erase marker, Super Tot will be able to use this book over and over!  He loves to write and is so excited to be learning his letters.

The completed project took under an hour and used supplies I already had on hand (including the album that I had previously purchased for such a project). 

I plan to have this available for Super Tot in the car during our upcoming Staycation (see my Staycation Binders here).  Then, I will be placing the tracing book into one of Super Tot’s Busy Bags (see here) for use at church, dr.’s office waiting rooms, etc.  I know we will get LOTS of use out of this simple and affordable project!


Monday, July 16, 2012

Staycation Binders and Fun!

Because we are still fairly new to our city, we decided that it would be fun to do a Staycation this summer and enjoy the many fun things our new home and surrounding area has to offer.  However, we wanted to be sure that it still felt like a vacation, so we made some plans to make it feel different from our every day life. 
   
First off, we are turning our home into a mini hotel, complete with turndown service, chocolates on the pillows, travel-size toiletries, etc.  My niece is flying in from out of state, so that will make it feel different, too!  


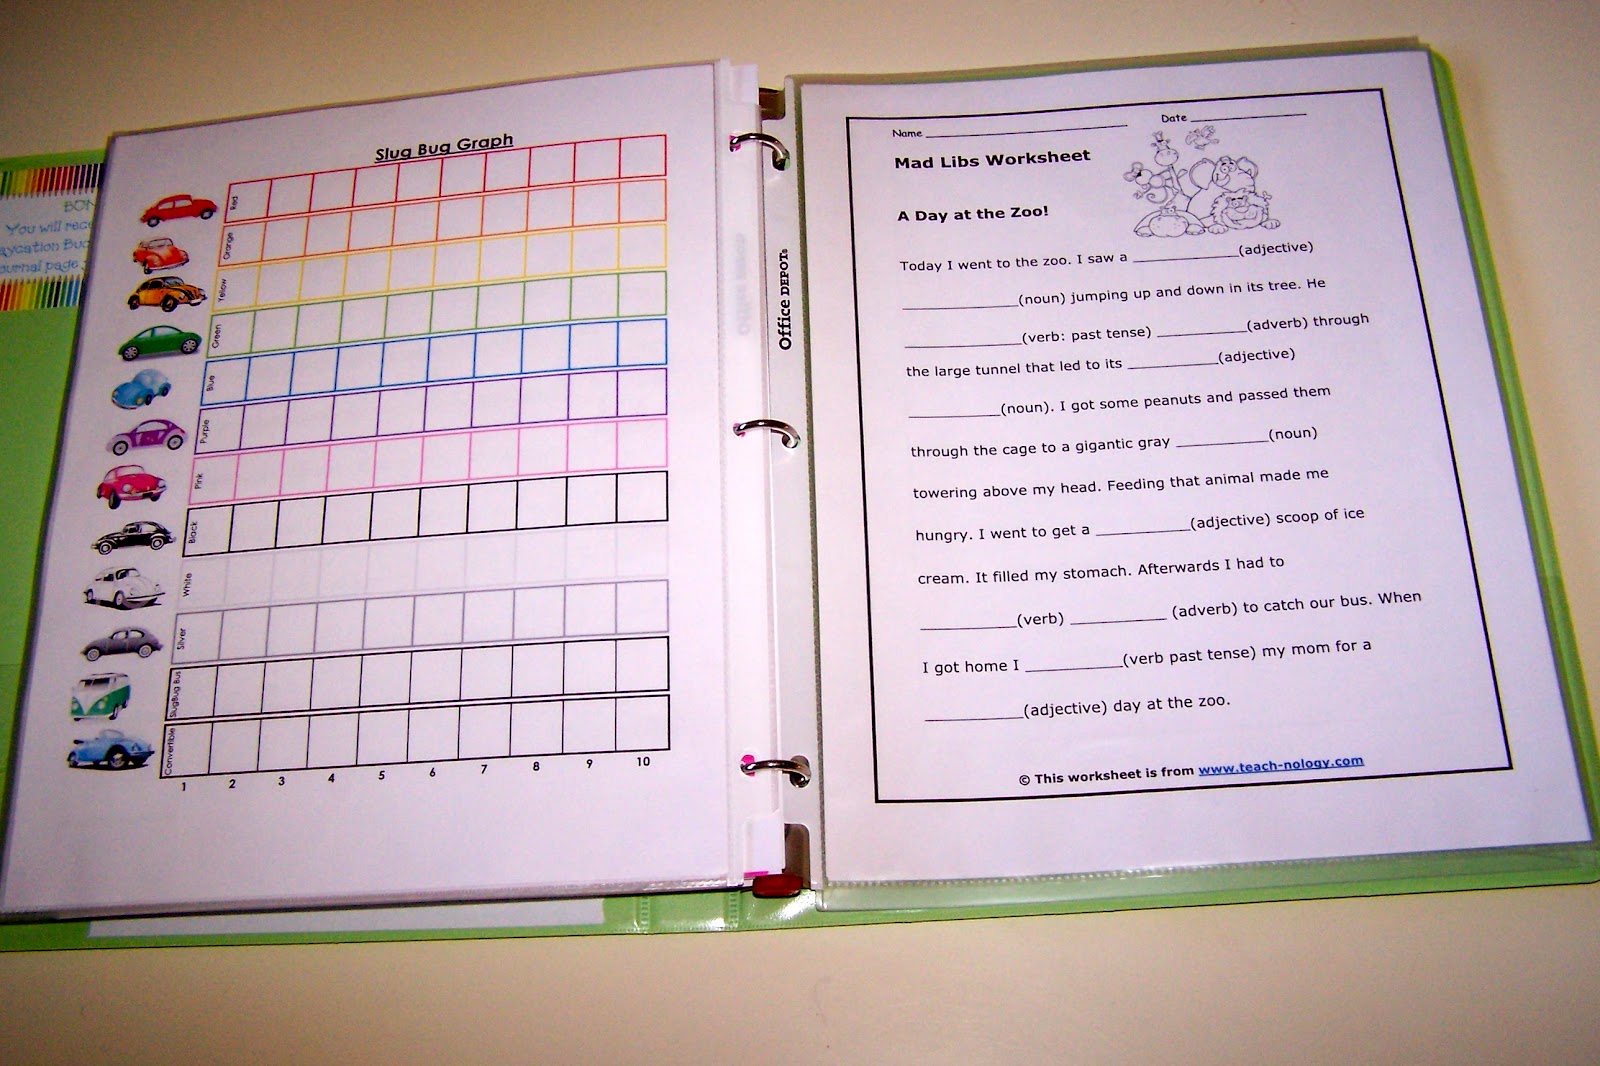
We have something fun planned for each day of our Staycation.  Several of our destinations are in neighboring cities and will require short travel.  While that doesn't exactly equal a road trip, I wanted to simulate that as much as possible.  I have created travel binders for road trips in the past, but many of the travel ideas I've used are for much longer road trips.  I was inspired by an idea I saw on Pinterest, and decided I could make the travel binders work for our week of fun.
Each child has their own binder.  The older girls' binders are identical, while Super Tot's is slightly different.  They all have a pencil case with a pen, pencil, dry erase marker & colored pencils.  The front pocket of the pencil case is for their "Staycation Bucks" (see below).
My favorite addition to our Staycation Binders, and something I have never done before, is Staycation Bucks.  The children can earn Staycation Bucks each day and trade them in for spending money.  See the FAQ below (which is included in the binders) for an explanation of how they work. I have also included the following printables at the bottom of this post:
Staycation Bucks
Staycation Bucks FAQ 
  -and, in case you are going on a regular vacation-
Vacation Bucks
Vacation Buck FAQ
 Staycation Bucks FAQ

What are Staycation Bucks?
Staycation Bucks are like spending money for our Staycation!

How do I earn Staycation Bucks?
Each day of our Staycation will present new and different opportunities for you to earn Staycation Bucks.  See each day’s itinerary for specifics opportunities available for that day.

Is there a limit to the number of Staycation Bucks I can earn?
You may earn up to 3 Staycation Bucks each day for catching Mommy or Daddy use the “Word of the Day.”  Each BONUS Staycation Bucks Challenge can be completed one time, earning 1 additional Staycation Buck per BONUS.

What do I do with the Staycation Bucks I have earned?
Staycation Bucks may be traded into cash at any point(s) during our Staycation. 

How much money are Staycation Bucks worth?
Each Staycation Buck is worth one (1) dollar.  However, if you save them up and trade them in 10 at a time, you will earn an extra dollar.  For example:

* 1 Staycation Buck = $1
* 5 Staycation Bucks = $5
...but...
* 10 Staycation Bucks = $11

Once I trade them in, what can I use my money for?
Once you’ve earned them, they are yours!  You can spend them on anything you want during our vacation souvenirs, gifts, etc.

Do I have to spend my Staycation Bucks on the day they are earned?
No, the Staycation Bucks are good for the entire Staycation, so feel free to save them up, or spend them however you choose!

Will you be buying me souvenirs or giving me additional spending money for our Staycation?
The Staycation Bucks are our contribution to your spending money, and we will not be providing you with additional funds.  We will, however, be covering all other costs during our trip, such as admissions, tickets, food, etc.  You are welcome to add your own cash to your spending money, as well.

I created a daily itinerary sheet for each day of our Staycation.  I also made cardstock dividers separating each day.  The dividers show the day and location.  Behind each divider is the daily itinerary.  
 The itinerary sheet highlights what we are doing that day, including fun things to look for and do, the Word of the Day (see the FAQ above), as well as a daily BONUS Challenge to complete to earn an additional Staycation Buck.  

The BONUS Challenges are different for each day and include scavenger hunts, historical trivia they will learn at specific destinations, physical challenges, etc.
Also included behind each divider is a journal sheet for that day.  If the kids complete their journal page, they will earn an additional Staycation Buck.
 
A few of our destinations are historical sites & museums.  I have included history sheets & information to read on the way behind the tabs for those days.  

The binders also include some fun games to play on the way to our various destinations.  I made an "I Spy" game which will actually be stored in a separate bag, but the "Find-It" Lists are in the binders.  The girls have a list of items, while Super Tot has pictures of the items to look for.
I also found some fun travel games online and included them in our binders.  They are placed in page protectors so they can be played multiple times.  You can find the games here, here and here.
I also printed off some Mad Libs for the girls and a few mazes for Super Tot.

The last item in the binders (though difficult to see here) is a large clear envelope.  This is for the kids to put brochures, ticket stubs, or other flat souvenirs from our trip.
In addition to the binders, I have a bag in the car of additional travel games and activities.  I actually created the bag for a road trip back in 2010 and have kept it in the car since that time.  We use it often!  It includes some Color Wonder activity pads, a small binder with additional travel games I made and printed, a book of travel games, and a set of Road Trip Scavenger Hunt cards I made.  

We have enjoyed this homemade game many times over the past 2 years, and I know we will enjoy it for many years to come.  I purchased a set of blank, Make-Your-Own flashcards and a set of rainbow Sharpie markers.  Then, I got to work!!  I made a list of 100 items we might see on various types of driving trips (city, country, etc.).  It took me several hours, but I drew and colored each of the 100 items, giving our family a one-of-a-kind road trip game!  When we play, we each draw 5 cards.  As we find an item on one of our cards, we place it in a "found" pile and draw another card.  When we get to our destination (or just decide to be finished playing), we tally up the found cards and whichever player has the most wins the game.  Almost all of the cards will work for any time we play, but if one is drawn that we know is impossible (ie. a toll booth where there is no toll road) - we allow that card to be exchanged.  It really is a fun game!  There are similar games available for purchase, but we love that ours is special and personal.  
I am so excited about our Staycation, and I know our kids are, too!  

Staycation Printables:
 

Vacation Printables:
  

Linking to:


Thursday, June 28, 2012

72 Hour Emergency Kits


For awhile now I have wanted to put together 72 hour emergency kits for our family.  I finally got it done this past weekend and feel such a relief in doing so.  I hope we never need them, but I am happy to feel prepared in the event that we do.  I still have a few personal items to add to each, but wanted to share with you what I have put together.
There are many formats for making an emergency kit, from duffles and totes to plastic bins.  I opted to use backpacks for ours.  I certainly don't expect us to be carrying them around much (they are heavy), but they will be easy to store and easy to grab in the event that we are forced to evacuate our home.  I was thrilled that all of the food easily fit into each bag, with extra room for personal and emergency supplies.  There is one bag for each member of our family, with the adult bags being a bit larger to fit additional emergency supplies and equipment.
The food contents of each bag are basically the same.  Each pack has food for 3 days, including 3 meals and a separate snack bag for each day.  Each meal is separated into its own plastic zipper bag, with one large snack bag for each day.  The bags are labeled with a sharpie specifying the day and meal. The main compartment of each pack also contains a large package of baby wipes, a large package of Wet Ones wipes, and an extra large package of jerkey (beef or turkey). There are utensils, flashlights w/ extra batteries, toothbrush & paste, soap, and a few other personal items in the outside section of each bag.  My bag has a can opener, while my husband's has instant Starbucks coffee.  It would absolutely be a disaster if we didn't get our coffee!!!  We also have 3 gallons of water per person, as well as an additional gallon for our cats.  Their food is in my pack (one can to split per day, plus a small bag of dry food).  The water is not in the backpacks, but will be stored with them for easy access.
 So, what we will be eating should we ever need to use our kits?  Here is a breakdown by meal/day.
(B = Breakfast, L = Lunch, D = Dinner, S = Snack)

Day 1
B - 2 Granola Bars, Craisins, Pears, Juice
L - Tuna Kit, Apple Sauce, 2 Candies
D - Chili, Corn, Goldfish Crackers, Cookies
S - Beef Jerkey, Stinger Waffle, Fruit Snacks, Chocolate Milk

Day 2
B - 2 Granola Bars, Meat Stick, Mandarine Oranges, Juice
L - Soup, Apple Sauce, Craisins, 2 Candies
D - Chicken & Rice, Green Beans, Meat Stick, Milk, Cookies
S - Craisins, Tuna Kit, Stinger Waffle, Chocolate Milk, Candy

Day 3
B - 2 Granola Bars, Apple Sauce, Meat Stick, Juice
L - Soup, Tuna Kit, Craisins, 2 Candies
D - Chili, Rice, Peaches, 2 Candies, Chocolate Milk
S - Mac N' Cheese, Cookies, Stinger Waffle, Meat Stick, Juice

It isn't fancy, but it is more than enough food.  We could certainly survive on a lot less.  

Each bag will also contain a laminated family photo, as well as individual laminated photos of each family member with names and emergency contact information on the back of each.  All packs will contain a small First Aid Kit (larger ones in the adult packs) and extra EpiPens for Super Tot, along with his allergy information.  We have a cordless weather radio with extra batteries, too.  
Should we be without water at home for an extended period of time, we also have 4 extra 5-gallon jugs for our water cooler.  We are also slowing adding to a small stock-pile of additional food at home in the event of an extended power outage.

There are many resources online that offer additional assistance in putting together emergency kits.  There are several other essential items to have on hand and easily accessible.  Most importantly (to me) is a family binder or file with important documents.  

As I mentioned before, I hope we never need these kits, but I am glad to be prepared in the event that we do. 

Wednesday, June 27, 2012

Homeschool Room Organization

One of the things on my plan for the summer was to redo our schoolroom.  Princess has moved into "middle school" and wanted to have a school desk, rather than a table for her daily work.  We searched quite a bit and found these adorable and customizable school desks online.  The best part is that they are adjustable in height, so they work for both kiddos, and will grow with them even through their high school years.  I also ordered matching chairs from the same company, but they were shipped separately and have not arrived yet.  

The kids LOVE their new desks, and so do I!
We continue to use our workbox system, which we love.  This will be our 3rd year using it, and I wouldn't change anything about the way we initially tweaked it to fit our family.  The only change is that this year, Super Tot wanted to move away from his Tot Trays and start having Preschool "Sissy Boxes".  Princess works her boxes in order and removes the number as she completes a box.   

 Super Tot's boxes will be more like his Tot Trays have been in the past.  I will simply be using the boxes, rather than trays.  Each box will contain an activity that Super Tot can do in any order (and as many times) as he wishes.  They will not be numbered, and they will be out all week, as before.  The only change will be how they are presented/displayed. 

This is what the boxes look like for Princess.  You can read more about the system here
Here are a few more photos of our new set-up.
 Super Tot's area showing his desk, workboxes, etc.
 I have had these drawers for many years, and they were purchased at The Container Store.  They no longer have units with the wooden top, but these are similar.  I use these to store various supplies for Super Tot's schooling.  
The top of the units hold coloring books and various resources I use for Super Tot's school.  I have a milk crate with various activities sorted by letter that I use for his "Letter of the Week" lessons.
 This is the front of our school room.  The crate below the calendar is for library books.  They go in the tote bag when they are ready to be returned.  We go to the library every Monday.  The bookcase under the white board contains various Bible resources, as well as general resources such as dictionaries, our thesaurus, etc.  The cubbies have white board & calendar supplies, as well as other misc. items.
 Another new thing I am implementing this coming year is calendar time.  I am very excited for Super Tot to start each day with Bible time, followed by calendar time to discuss the days of the week, months, seasons, weather, etc.  I used several ideas I found online and combined them to create our own personal calendar.  
I am blessed to have an incredible teacher space in our current home.  All of our texts, teacher manuals, and my planning items for this year are on my built-in desk.  This is also where I have my daily quiet time.  Our family computer is on a small desk in the corner.  
I often receive e-mails inquiring about how I store my various Tot School/Preschool supplies.  I have a closet in our guest room that I use for school storage.  It contains two large metal shelving units.  They may not appear to be very organized, but each shelf and container contains a different theme, skill or type of supply.  
 We have various bookshelves in almost every room of our house containing our personal home library.  They are not organized as well as I would like, as we have moved shelves in a hurry and just placed the books back on.  Reorganizing them is still on my agenda this summer.  We also have baskets full of books in several rooms.  Here are a few of the shelves containing most of our school resources.
 Our homeschool space isn't perfect, but I feel so incredibly blessed to have the room and resources that we currently have.  We expect to move into a smaller urban home in a couple years, and I know that will mean a much smaller school space.  I feel confident that the organization of our current space will make that transition and downsizing easier, and I know that we will be able to make our actual work space fit into whatever home the Lord provides.  

Monday, June 4, 2012

Happy Summer!!


I am taking a break from blogging this summer to focus wholly on the Lord and my family.  I pray you have a safe and blessed summer.  Please feel free to browse my previous posts, and to contact me should you need anything.  Otherwise, I hope to see you in the fall!